We all know the drill (pun intended). You’re in a mad dash to get something fixed and back on-line. All you need is to drill one hole and run a bolt through it to hold whatever in place, and you are finished.

You grab the drill and a drill bit and then – whoops – the drill bit you grabbed is so dull you doubt it would push through mud.
It’s a fairly simple procedure to sharpen a drill bit. First, look at a new drill bit and notice the angles and position of the edges of the cutting tip on the bit. Now all you have to do is make a used, dull or broken bit look like that.
Most bench grinders have an angled depression on the tool rest. This is close to the correct angle for most drill bits.
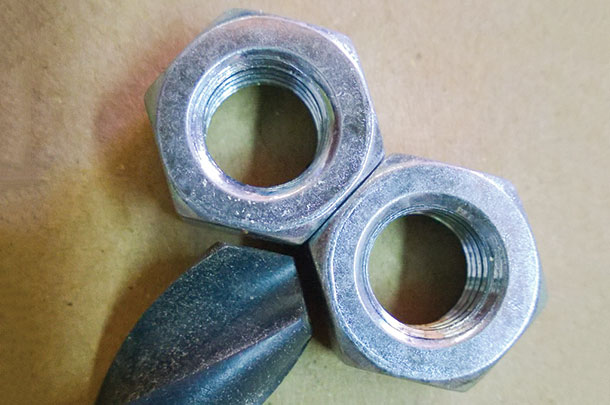
If you place two hex nuts adjacent to each other with flat sides touching, the angle of the “V” shape between the two nuts is the same angle (or shape) you want to end up with on your finished sharpened bit (Photo 1).
With appropriate safety items in place (such as eye protection), hold the bit next to the grindstone on the bench grinder. For a large bit that needs lots of metal removed to restore the cutting edge, start with a coarse grinding wheel, then finish sharpening with the fine or smoother stone.
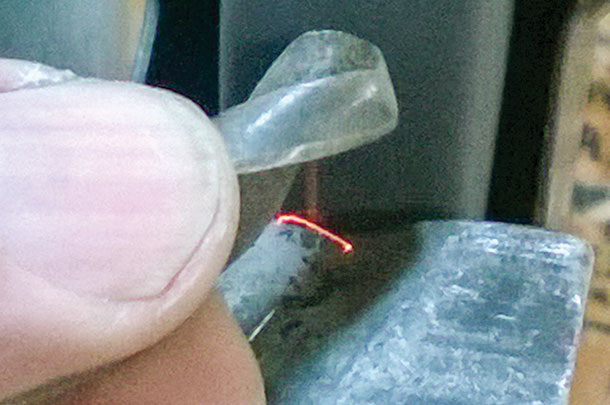
Place the finger of your left hand on the tool rest and lay the drill bit across that finger at the correct angle. You will be using that finger as a fulcrum to roll the bit as you hold it against the grinding wheel as you sharpen it (Photo 2).
Note that you need the edge of the grinding wheel to be smooth and flat. If it is not, use a dressing tool to smooth and flatten it.
Hold the cutting edge of one flute of the bit parallel to the face of the grinding wheel. Gently push it against the wheel until you see sparks on the very tip of the cutting edge.
If you see sparks, but they are not at the tip of the cutting edge, you are grinding behind (below) the tip. Raise the butt end of the bit until you do have sparks at the tip.
Now, keeping the cutting tip parallel with the face of the stone, gently roll the butt end of the bit down, and as you do so with your left-hand finger as a fulcrum, the tip will rise, and as it does, hold it gently against the wheel to grind against the bit behind (below) the cutting tip.
The sparks you see as you begin are from the grinding wheel smoothing and sharpening the cutting edge tip. As you rock the bit, lifting the tip of the cutting edge away from the grinding wheel, you are removing metal behind the tip so that the cutting tip will be the highest part of the drill bit as it contacts the metal in the hole you will be drilling.
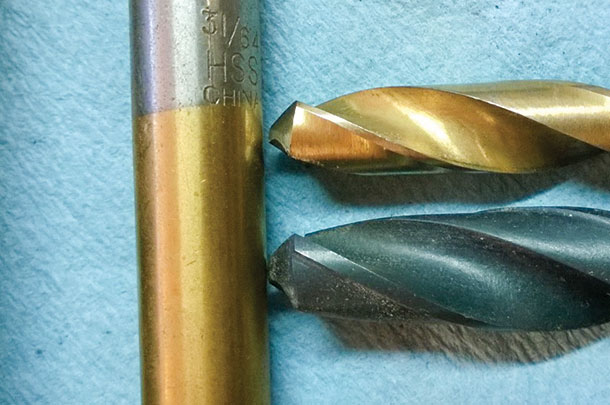
The usual novice result is to leave the heel of the flute higher than the cutting tip, in which case the sharp edge will not contact the metal (Photo 3).
The procedure in my shop is to touch up a drill bit after every use. That way, when I’m in a hurry, all the bits are sharp. If you share a shop with others, it may be easier to just plan on sharpening a drill bit before you use it. It takes about 30 seconds to touch up a bit and no more than a minute to bring back an abused, broken or chipped bit.
Note that the shape of the flutes change from thin to thicker from the tip toward the butt end of the drill bit. If you are dealing with a bit that has been broken, you will still be able to make a sharp cutting edge, but the tip will look fat and ugly as compared to the tip toward the original end of a bit.
This doesn’t mean you’ve lost it – just that the shape of the flutes on the drill bit have changed.
There are different types of drill bits available. Black oxide will be the least expensive, followed by bits coated with titanium nitride. These will have a gold color. The base metal is usually the same, but the titanium nitride (tin) coating is supposed to make the bits run cooler. For two to three times the price, cobalt drill bits are available.
Cobalt bits are alloyed so they are very hard and yet not brittle. You will note that a sharp “normal” drill bit will chip along the cutting surface under abusive or hard use. I have a set of cobalt bits that work as advertised, and I have not yet needed to sharpen one. They are also stored out of sight.
There are some oddball applications that need a different grind. Soft but tough materials, like the exotic plastics used as slide pieces to either protect the steel parts from wear or to allow parts to slide under pressure without grease, have special needs.
A normal or aggressive grind on a drill bit will grab and then punch through these materials without cutting a round hole.
Sharpen a drill bit for this material so the heel of the flute is just barely lower than the cutting edge. This will help but not stop the tendency of the bit to punch through the softer material.
Another help is to sharpen the bit with the tip angle being closer to a right angle of the shank of the bit than normal. This will also make the bit tend to bite into less material than normal.
To drill only a shallow hole or to make a countersink cavity for the heads of bolts you want recessed from the surface, get a shaft collar and attach it to the end of the drill bit so it prevents the drill bit from going deeper than you want it to.
It may feel like you are practicing rocket science working with some of these materials, but it’s not really. Just learn how different materials react to being machined and drilled.
More tips for drilling
A pilot hole is not always a good idea on thicker steel. The heat created by drilling the pilot hole may react with impurities in the steel to spot-harden it so that when the full-sized hole is attempted following the smaller pilot hole, the larger bit will come to the hardened spot and stop cutting metal.
Some form of cutting oil (thread cutting, etc.) will ease a drilling job.
High-dollar and oversize drill bits usually have three flats on the butt end of the shank of the drill bit. This is where the jaws of the drill chuck should clamp onto the bit. The flats keep the bit from twisting inside the chuck when the bit hits the hard spot as it starts to punch through the end of the hole.
If what you’re drilling is making your drill bit do this, you can make your own flats with the grinder.
It takes less time to stop and re-sharpen the drill bit than to macho it on through. PD
PHOTO 1: This is the proper angle for the tip.
PHOTO 2: Use your finger as a fulcrum on which to roll the bit as you move it against the grindstone.
PHOTO 3: The top bit is sharpened with the heel higher than the cutting edge. The high heel will hold the cutting edge away from the metal you are trying to drill. The bottom is a new bit. Photos provided by Brad Nelson.

-
Brad Nelson
- Freelance Writer
- Royal City, Washington