Hoof blocks are an important component of the lameness management toolbox. Diseased or overtrimmed claws are both likely candidates to receive therapeutic hoof blocks. Blocking helps provide much-needed relief from weight-bearing by transferring weight onto the healthy claw so the damaged claw has sufficient time to heal.

Since trimming is part of the hoof-blocking process, it’s important to properly trim the hoof and follow best practices.
There are several common conditions that can be therapeutically treated with hoof blocks, including:
- White-line disease
- Sole ulcer
- Toe ulcer
- Heel fracture
- Thin sole
- Improper trimming – toe too short or sole damage due to grinder or tool error
- Hairy attack – a digital dermatitis infection underneath the horn of the wall or sole
- Injury
Before a block is applied, however, several functional hoof-trimming procedures must be completed.
How to prepare the foot for the block
The trimming process can be clearly described in five steps. Steps 1 to 3 are part of the functional trimming to re-establish the optimal functional conformation of the foot. Steps 4 and 5 are part of the therapeutic trimming to solve any lesion that might be compromising locomotion or inflicting discomfort on the cow.
The first step of the trimming process applies to the medial (inside) claw of rear feet; the second step applies to the lateral (outside) claw of front feet. Note: The following trimming steps are associated with trimming of a rear foot.
1. If present, remove the buckle in the dorsal wall (front) of medial claw, then trim the toe to 3 inches length (minimum). The buckle is the curve or bend in the front wall of the claw horn.
Not all claws have this bend or buckle, but removal is key to re-establishing proper toe length, structural integrity and conformation. An additional 0.5 to 0.8 cm is justified for cows of larger size (bodyweight) or those with large claws.
- Trim the sole flat, so it is perpendicular to the shin bone.
- Leave 0.25 inch or 5 to 6.5 mm of sole thickness at the toe.
- Spare 100 percent of the heel horn to achieve a 50- to 52-degree angle at the toe for Holstein cattle, or 45- to 48-degree toe angle for Jersey cattle. Any trimming of the heel will reduce claw angle.
2. Trim the lateral claw to match the medial claw.
- Remove buckle and establish toe length using the medial claw as a model.
- Trim the sole to match the medial when sole depth exceeds 0.25 inch or 5 to 6.5 mm.
- Balance heel height while striving to maintain a 1.5-inch heel depth.
3. Model or slope the soles in the axial (inner, between claws) space without removing any white line.
- Medial claw – remove about one-quarter or less of the sole in the axial space.
- Lateral claw – remove two-thirds or more of the sole in axial space, with a goal of equalizing the sole area between claws.
4. When the lateral toe is the affected claw, the height of the lateral heel is reduced by trimming down the posterior half of the toe, saving 100 percent of the anterior part of the toe (toe triangle).
A hoof block will need to be applied to the sound claw if you are unable to lower the heel and sole of the affected claw to provide enough rest and avoid direct contact of the lesion with the floor.
5. Therapeutically trim loose horn. On the medial claw, remove only loose horn on the heel bulb. Do not touch other loose horn that may be present on the sole. On the lateral claw, remove all loose or unhealthy horn. It is important to save and respect the toe triangle area.
Inspect all abnormalities, cracks, fissures or irregular discolorations that may lead to an underlying lesion. Finish by thinning and tapering around the lesions to remove all necrotic, diseased or damaged horn.
Block selection
Proper block size depends on claw size. Blocks should sufficiently cover the sole of the claw from toe to heel. A wider block wears more evenly throughout and also offers more stability. Block thickness is dictated by rate of wear, created by the cow’s environment and length of time needed for the healing process.
Most blocks are 0.75 inch to 1 inch thick and usually last 28 to 35 days. Cows with severe lesions (such as toe ulcers) may require additional block thickness for extended time of healing and protection against further impact injury. A 1.5-inch or 2-inch double block may be necessary to provide sufficient weight transfer off the affected claw.
Material selection is dependent on the severity of the lesions. More severe lesions require the most durable block type.
A less durable block will not provide sufficient weight transfer off the affected claw for the required period of time to allow full healing of the lesion when cattle are walking on abrasive flooring, such as rough concrete or concrete where sand bedding is used.
Be sure to follow all labels on block adhesives, and pay special attention to storage temperatures and application time and temperatures.
Proper block application
Step 1
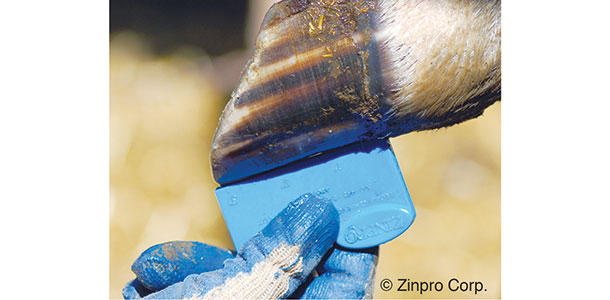
Check to make sure the block is applied such that weight is transferred off the diseased or damaged claw. Note, the block is 5 degrees higher on the axial side to help lift weight off the affected claw. This also helps pull the block in under the foot, giving it more support and stability.

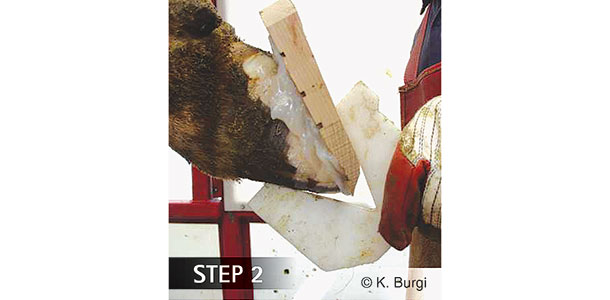
Step 2
Make sure the block is applied so that a 50- to 52-degree hoof angle is maintained. Rebalance or reshape block if needed.
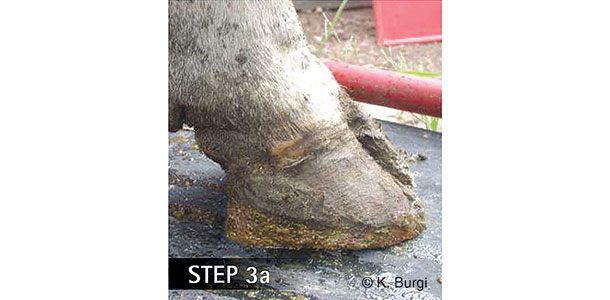
Step 3a
Apply the block flush or slightly recessed from the tip of the toe.
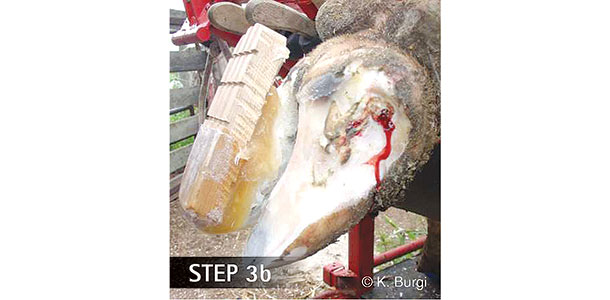
Step 3b
Blocks should have sufficient length to support the heel and be stable.
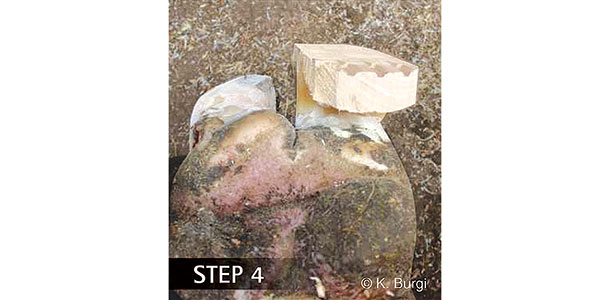
Step 4
Carefully place the block to ensure it is perpendicular with the shin bone and parallel with the axis between the claws. Allow block glue to fully cure before releasing the foot.
Step 5
Examine the cow at three and six weeks after block application to inspect lesion recovery and determine the block’s shape and status. If necessary, reshape, rebalance, replace or remove the block at inspection time.
Follow-up care after blocks are applied
Remember, when blocks are applied, they also have to be removed. Any cow that has been blocked should be re-examined after about three weeks for block replacement or rebalancing and to ensure lesion recovery is progressing.
Cows should be examined again after another 21 days for block removal, replacement or rebalancing. If the condition has not fully healed, a new block should be applied again for three to five more weeks.
Leaving blocks on for extended periods without examining the claw may lead to damage to the blocked claw. At each re-evaluation, the affected claw should be thoroughly inspected and any irregular, loose or necrotic horn should be removed to stimulate proper healing of the claw horn.
While blocks can play an important role in recovering from claw injuries and lameness, an improperly applied block can do more harm than good, so always follow best practices when trimming and blocking feet. PD
Dr. Dana Tomlinson has a doctorate degree in animal science, ruminant nutrition and management from Virginia Polytechnic Institute and State University and is employed by Zinpro Corporation as a research nutritionist based in Virginia.
PHOTO
TOP: If present, remove the buckle in the dorsal wall (front) of medial claw, then trim the toe to 3 inches length (minimum). Courtesy of Dana Tomlinson .

Dana Tomlinson
Research Nutritionist
Zinpro Corporation
DO
- Properly trim and balance the claws before applying a block or addressing claw lesions.
- Properly prepare the load-bearing claw for the block to ensure good adhesion and comfort.
This includes cleaning and drying the claw and block. - Select the right block for the cow and her environment.
- Apply a block to any animal with a significant lesion needing relief from weight-bearing and time for recovery.
- Only apply blocks to healthy claws.
- Block any animal that has been overtrimmed in toe length or sole thickness.
- Block any claw that has significant pain or exposure of corium tissue.
- Double-check blocks to monitor proper application and recovery.
- Follow all labels on block adhesives and pay special attention to storage and application temperatures.
- When in doubt, block it.
DON'T
- Use blocks that are too small, too short or do not adequately support the heel.
- Use blocks that wear too quickly resulting in imbalance, discomfort or that shift weight back onto the affected claw.
- Apply glue to exposed corium or a sole that is too thin, as it may damage the claw.
- Apply an insufficient amount of glue, as it will result in poor adhesion and premature loss of blocks.
- Apply glue on a dirty, wet or cold claw.
- Apply blocks at angles that are not perpendicular to the leg or parallel with the axis between the claws.
- Apply block too far forward, failing to provide heel support.
- Use cold glue, which will not adequately set, resulting in poor block adhesion.
- Apply too much glue to the heel, as it may create pinch points under the heel bulb and result in additional lameness.
- Release leg until glue is fully cured.