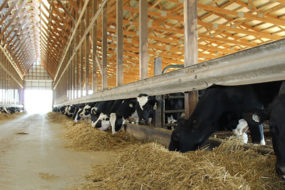
Average SCC for the Adamses’ 600 Holsteins ranged from 160,000 in winter to more than 200,000 in summer. One consultant told them their milking system was obsolete, and the only solution was a complete parlor replacement.
Instead, the couple worked with a veterinary consultant and trusted equipment supplier to implement a series of small changes that included switching to a square, narrow-bore inflation designed to reduce hyperkeratosis, installing a new pulsator and following a strict maintenance OEM program. By the winter of 2017, SCC at Sugar Creek Dairy fell below 100,000 for the first time. This past summer, one of the hottest on record, it never rose above 120,000.
But the surprise bonus, according to Rick Adams, was the increase in milking speed.
“We discovered we were moving cows through the parlor about 45 minutes faster than before,” he says. “So not only did we have great SCC numbers with less mastitis and less-stressed cows, we were able to milk those cows more quickly without having to spend a lot of money on new equipment. I’m kicking myself for not doing it sooner.”
The Adamses’ experience shows that faster milking doesn’t have to come at the expense of cow health and milk quality. Many factors are, of course, necessary for successful milking, but focusing on a few key areas of the milking system can help almost any dairy optimize their settings to harvest milk as quickly, gently and completely as possible. Here are five steps dairy managers can take now for faster, safer milking:
Step 1: Know the recommended vacuum range for your liner
Liner design has a greater influence on milking performance than any other machine factor, and today’s producers have their choice of a wide variety of inflation types, including models designed specifically for gentle milking at higher speeds. However, experts caution against choosing a liner based on any one specific feature.
“If there was a silver-bullet liner that stopped mastitis, everyone would be using it,” says Andrew Johnson, DVM, a veterinary parlor consultant and former president of the National Mastitis Council. “A liner that milks out fast, and is gentle to the cow, is only part of the story. You also need to have the right vacuum and pulsation settings to maximize performance of the liner you have.”
David Reid, DVM, a practicing veterinarian for 45 years and leading dairy industry consultant, agrees. “There are many liners out there, and most work very well if they are set up right,” he says. “Unfortunately, most are not set up right.”
Setting up the liner for optimum performance means maintaining average claw vacuum within the range recommended by the liner’s manufacturer. Vacuum recommendations vary widely based on liner material, barrel shape, barrel thickness and other physical characteristics. Operating outside the recommended range can lead to slower milking, liner slips, undermilking of high-producing cows and teat-end damage.
“The main driver that impacts teat health is the duration the unit is on the cow,” Reid says. “To make the most of machine on-time, you need to know the vacuum range recommended by the manufacturer, and you need to do dynamic testing of claw vacuum under intended-use conditions.”
Step 2: Measure claw vacuum during peak milk flow
Claw vacuum, not system vacuum, is the most important and direct measurement of milking machine performance, Johnson says.
“System vacuum is irrelevant,” he says. “What matters is average claw vacuum during milking in the highest-producing cows. It’s the starting point for setting system vacuum that best matches the liner.”
Because claw vacuum is inversely proportional to milk flow rate, it will be lowest at peak flow, generally between the first and second minute after unit attachment, and highest at the end of milking, approaching parity with system vacuum. The greater the drop between system vacuum and claw vacuum, the greater the risk of liner slip and loss of milking efficiency. Average claw vacuum at peak flow, therefore, should not only fall within the range recommended by the liner manufacturer but also be low enough at the end of milking to moderate the vacuum drop when units detach.
Using a needle inserted through the short milk tube, measure vacuum level in the claw for five to 20 seconds between the first and second minute after unit attachment, or after about 7 to 8 pounds of milk. The National Mastitis Council recommends testing claw vacuum in at least 10 randomly selected cows to best accommodate most of the herd. Once you’ve calculated average claw vacuum and compared it to the range recommended by the liner manufacturer, it’s time to take a look at the milk path.
Step 3: Optimize milk flow
“Milk flow needs to be addressed before you start adjusting system vacuum or pulsation,” Reid says. “If you’re able to remove restrictions in the milk path, you may be able to raise claw vacuum to the optimum level without any other adjustments.”
Connecting hoses that are too long, twisted, not properly aligned in relation to the cow or fighting too hard against gravity can result in incomplete milking. Overused hoses can develop cracks, allowing air and pathogens to enter the line, and should be replaced every six months or as necessary. To ensure hoses are cut to the correct length, he recommends dairies keep a PVC pipe of the correct length on hand to aid employees in measuring replacements.
Shortening and replacing worn hoses, removing restrictions in the milk path and working with gravity may be sufficient for raising average claw vacuum into the recommended range. Additional fine-tuning of system vacuum and pulsation can help dairy managers take their system to the next level for faster, gentle and more complete milking.
Step 4: Adjust and observe
Set the system vacuum so average claw vacuum is approximately in the middle of the recommended range for the liner you’re using and observe the cows. Are they kicking, stamping, dumping manure? If cows appear comfortable and are milking out cleanly with little teat-end congestion, begin raising the vacuum about 0.3 inHg (7.6 kPa) every three days. Randomly hand-strip a few cows after the units come off. Continue raising vacuum slowly and incrementally without going outside the recommended range. If cows remain relaxed, with no signs of ringing or congestion, that’s a good indication that system vacuum is set correctly for that liner and your herd.
Reid cautions against ignoring signs of discomfort in first-calf heifers. “Producers tell me it’s normal for first-calf heifers to kick and dance in the barn, but it doesn’t have to be normal,” he says. “If vacuum is in the optimal range for the liner, and you’ve allowed the herd time to adjust, even first-calf heifers should remain relaxed during milking.”
Step 5: Pay attention to pulsation
Pulsators should be open about 60% of the time, extracting milk, and closed about 40% of the time, resting or massaging the teats. If the pulsator milk-to-rest ratio is off, cows may not milk out adequately, and mastitis may result.
Johnson recommends focusing on the phases of pulsation rather than the ratio, especially the B-phase (liner fully open) and D-phase (liner fully closed). Generally, the B-phase should be at least 30% of the pulsation cycle, while the D-phase should be no less than 15% of the cycle. Specific recommendations range from 500 to 600 ms for the B-phase and 150 to 250 ms for the D-phase. Dairy managers should experiment to find the ranges that work best for their herds and goals for speed and cow comfort.
“I like my B-phase to be about 490 to 530 ms and my D-phase to never be below 220 ms,” Johnson says. “This range makes me confident I can get fast milking, give the teat ends a decent rest and have good milk quality.”
As with system vacuum, pulsation should be set according to recommendations by the liner manufacturer, then adjusted as needed. Many pulsators are set at 60 beats per minute but can be slowed to 58 beats or less in order to achieve the proper B- and D-phase for fast, gentle milking.
“If you can get a good D-phase with good massage at a higher vacuum, and harvest more milk per cow per hour, congestion should not be an issue,” Johnson says.
The number of cows that can be milked per hour is an important chokepoint of herd capacity, yet many producers hesitate to increase milking speed for fear of compromising udder health. However, veterinarians, parlor consultants and progressive producers agree that faster, safer milking is possible as long as animal welfare comes first.
“Producers need to be in the barn and see how their cows adjust to change, especially during milking,” Reid says. “They need to learn what makes cows most relaxed because relaxed cows produce more milk.”
Rick Adams agrees. “The cows will always tell you what you need to do,” he says. “Just pay attention and trust your instincts.” ![]()
—Submitted by Kim Parr for Conewango and LP&M


