A few years ago, when I was approached about writing a column for this magazine, one question the editor asked me to respond to was: “What is the one tool I couldn’t do without?” It was a more daunting task than I anticipated. Just about the time I settled on an answer, another would crop up.

A few months ago, to follow that theme, I wrote a column about how tools and tasks evolve over time. There is a need to update tools from time to time, and even if you have a vast assortment of tools, it is likely that, over time, you will run across an issue that requires something special to get the job done.
As the son of a former tractor mechanic, I inherited a great collection of tools. There are tools I have never used and those I hope to never have to use, but still I am glad they are on hand. It got me thinking about some of the tools I take for granted that may not be in every farm shop but, over time, sure could solve a bunch of problems and cure a good many headaches.
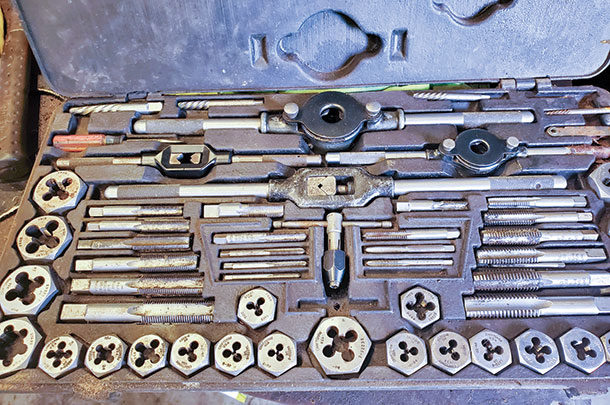
I will begin with a set of tools Dad owned well before I was born – his tap and die set (Photo 1). Taps and dies are used to clean and straighten threads on bolts, nuts or threads holes that bolts stud into. I recently purchased a new-to-me tractor, an experienced old piece of iron I am very fond of already.
The tractor came with no front suitcase weights nor a bracket to hang them on the tractor. That was no problem; I had a bracket and plenty of weights. I simply needed to bolt the bracket on, hang the weights and secure them with a piece of angle iron.
Even though the tractor had recently been restored, there are always areas that hide and do not get attention or (just as bad) get filled with excess paint that needs to be cleaned out. The bracket attaches to the tractor’s front bolster using 3/4-inch coarse thread Grade 8 bolts. Looking at the holes threaded into the bolster, it was tough for me to see if the holes were threaded or not (Photo 2).
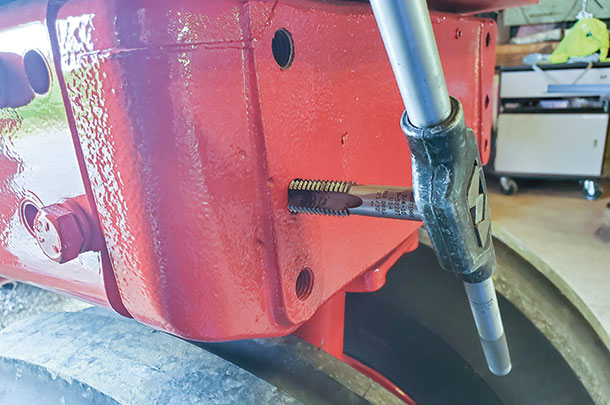 Photo 2. Photo by Andy Overbay.
Retrieving a 3/4 tap and handle from the tap and die set, I began to “run the threads” of the bolster. Screwing the tap in just as I would a bolt, I backed the tap out once it got tight to clean the thread and allow dirt and rust to fall away.
From the photos I took (Photos 3 and 4), you can see that even though the tractor was shiny and clean on the surface, there was plenty of debris in the threads of the bolster. I worked for several minutes inserting the tap, cleaning the threads a few more turns and backing out the tap in order to remove the collected rust and dirt.
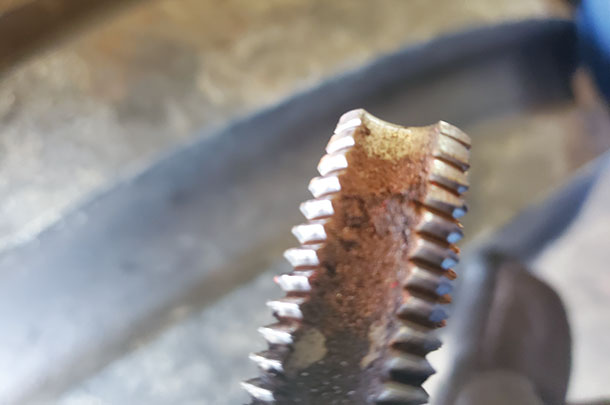
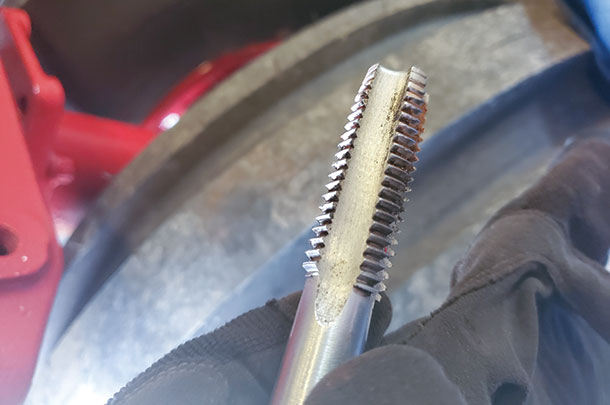 Photo 4. Photo by Andy Overbay.
Once I got the threads cleaned completely, the bolts to hold the bracket drew up quickly and easily, but because the tap protected the contact surface of the threads, the bolts were good and tight as well.
Threads of bolts, nuts and metal materials like the bolster can become bent or damaged as well. Taps can be used to straighten existing threads or cut new threads into newly bored holes. In a similar fashion, dies can repair threads of a bolt or cut threads on smooth rods to create custom bolts.
Even when threads are worn to where bolts do not fit any longer, you can bore the hole smooth with a drill bit and use a next-size-larger tap to thread the hole for a larger bolt – extending the functional life of the equipment being repaired.
Another tool I have grown fond of is my set of reaming bits. I was with Dad when he bought these at the National Farm Machinery Show in Louisville, so they aren’t that old – but then again, Dad has been gone 16 years in November, so the bits have held up well when I think about it.
In Photo 5, I am holding a 3/4-inch drill bit and a 3/4-inch reamer.
 Photo 5. Photo by Andy Overbay.
Reamers work by cutting away at the sides of a pilot hole drilled in steel or other materials. They tend to be easier on fragile materials because they aren’t trying to twist and cut downward, or rather shave away the sides of the pilot hole.
Unlike a drill bit that cuts the full width of the bit as soon as the point clears, reamers work progressively. I am sure you can buy reamers in various sizes like drill bits; however, our set jumps from 3/8 to 1/2 to 5/8 and finally 3/4-inch. For desired hole sizes in between, you can simply not plunge the reamer to its maximum width and do trial-and-error or use a micrometer and tape to mark the desired hole width you wish to achieve.
Regardless, it is much easier to drill a smaller pilot hole and use the reamer to finish the hole to the desired width as opposed to using a regular drill bit to do the same cutting. I also find that a reamer produces fewer spurs and rough edges that need to be ground away from a drilled hole.
Whether you invest in a set of reaming bits or not, one thing you can do to make life easier is take the time to measure twice and drill straight. Dad got me into the habit of scoring the metal I intended to drill by making a small indention in the steel using a small punch and hammer. Just the slightest of dents will give the point of your pilot bit a place to settle as you begin to drill and keep the bit from “walking” off-center.