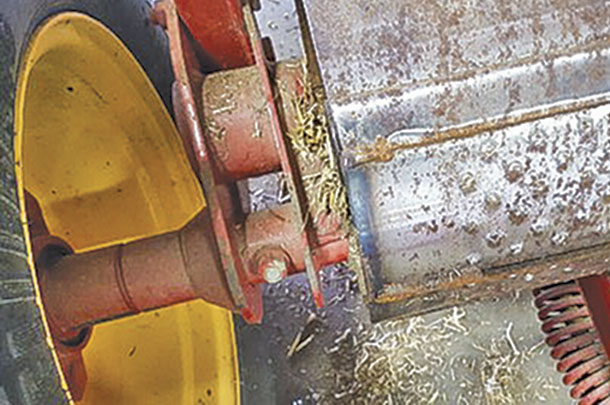
In extreme situations, the friction between the roll, packed material and side sheet generates heat (Photo 1).

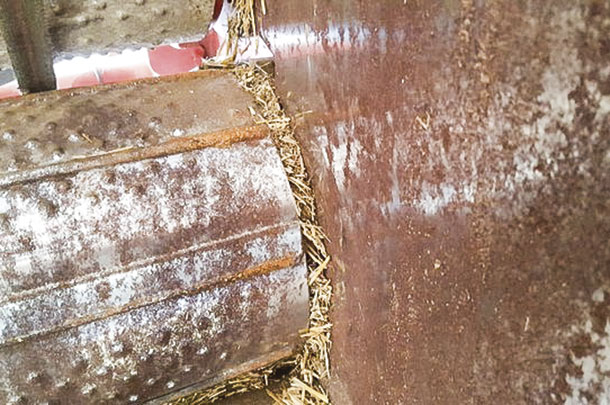
If enough heat is generated, the potential of a fire breaking out increases (Photo 2).

One of the first signs of the problem is: The net does not spread well, since the net will stick to the hot roll.
Step 1: To remedy the situation, the roll will need to come out of the baler. The stationary roll rides on a separate hex shaft. To remove the stationary roll hex shaft, on the left side, remove the drive chain and sprocket. Remove the four bearing flange bolts, and remove the bearing and flanges. There is a spacer and washers between the bearing and the roll to center the roll. Remove these items.
On the right side, you will need to remove the sledge roll drive chain, and auto-wrap belt, if equipped. The hex shaft can be removed without removing the pulley (if equipped) and the sprocket. As the shaft slides to the right, the pulley and sprocket will move away from the baler so you can remove the four bearing mounting bolts on the right side. The right bearing, flanges, spacer and shims will come out with the hex shaft.
Lubricate the left side of the hex shaft and pull or drive the hex shaft to the right. I work the shaft back and forth, lubricating the shaft on each end as I go. This will clean the shaft and make it easier to pull the hex shaft out without having to drive against the shaft excessively. The roll will not fall out since the anti-wrap plates will hold the roll in position.
To keep the roll from falling out when the anti-wrap shield bolts are removed, I place a shaft across the width of the baler and attach straps to the roll. The belts are removed on this baler, but removing the belts is not necessary to remove the roll.
Once the roll is retained with the straps, remove the two bolts holding the anti-wrap shields to the baler. This will free the roll for removal. The bolts are accessed through the opening created by removing the roll bearings. You will find two bolt heads and two nuts. The nuts retain the sledge frame to the pivot block. Do not remove the nuts. Only remove the two bolts on each side. The roll may be difficult to remove if there is a large amount of material packed between the parts (Photo 3).
Step 2: Clean the material from the ends of the rolls.
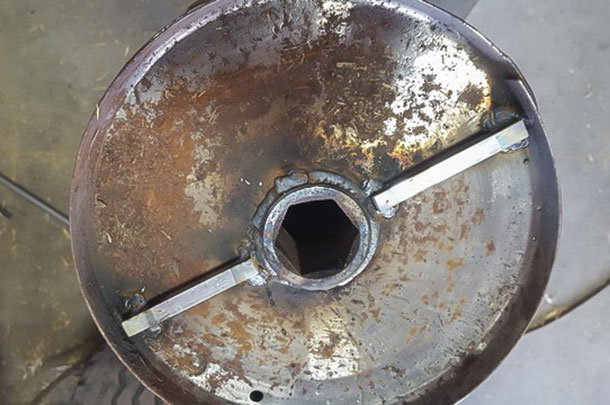
Step 3: To correct the problem, start by cutting lengths of 3/8-inch key stock to fit between the roll hub and just short of the outer edge of the roll. Weld the key stock to the roll.
Step 4: Cut the lower section from both of the anti-wrap shields.
Step 5: Temporarily bolt the cut anti-wrap shields to the sledge frame and pivot. With the key stock welded to the end of the roll, the key stock will contact the two bolts holding the anti-wrap shield to the sledge frame and pivot block. Cut the two bolts flush with the nuts welded to the anti-wrap shield. Remove the anti-wrap shields. Place the anti-wrap shields inside the ends of the roll, and install the roll reversing the removal process. ![]()
PHOTO 1: This is an extreme case where material has packed between the roll and anti-wrap shield.
PHOTO 2: If enough heat is generated, the potential of a fire breaking out increases
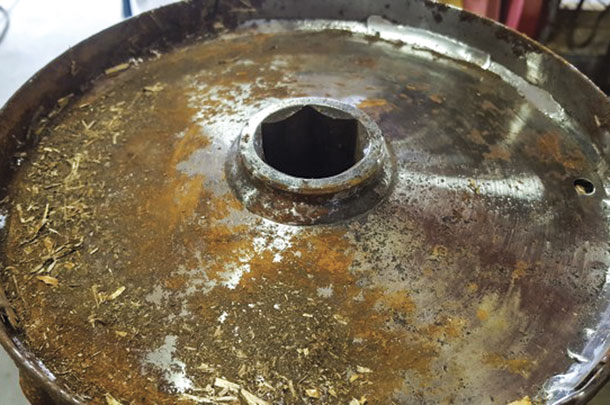
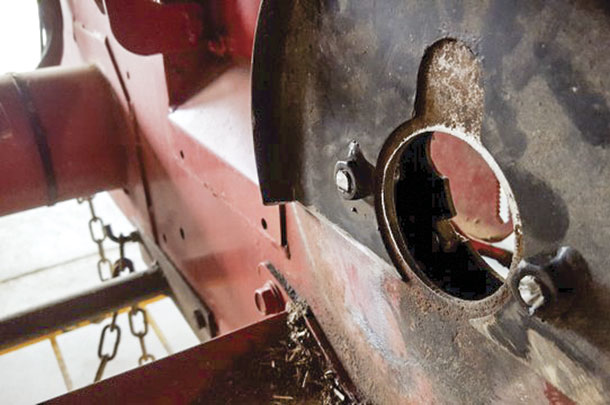
PHOTO 3: This photo shows material packed on the end of the stationary roll.
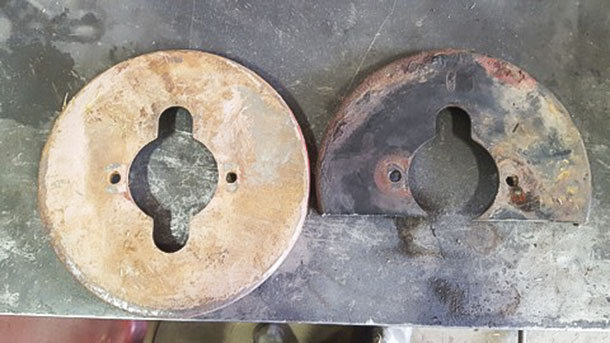
PHOTO 4: This roll was hot enough to turn the metal blue.
PHOTO 5: Clean the material from the ends of the rolls.
PHOTO 6: To correct the problem, start by cutting lengths of 3/8-inch key stock to fit between the roll hub and just short of the outer edge of the roll. Weld the key stock to the roll.
PHOTO 7: Cut the lower section from both of the anti-wrap shields.
PHOTO 8: Temporarily bolt the cut anti-wrap shields to the sledge frame and pivot. Photos provided by Mike Seckinger.
Mike Seckinger has over 44 years experience as a farm equipment mechanic in southern Indiana and says, “What I write is not intended to represent the only way to solve a problem, and it may not always be complete. If you choose to follow some of my procedures, remember to always practice safety first. Wear the correct clothing and safety equipment, and use the equipment’s safety devices.”


